EJB is a Java API in J2EE specifications. Enterprise Java Bean is nothing but a server side architecture to enhance the code re-usability in real sense. The basic need is to keep the entire Business Logic as Java Bean on the server. Here the business logic java bean is totally exposed and can be accessed by clients on the server, other servers and even remote desktop applications.
For example, a mathematical operation java bean with add and subtract methods is exposed from an Application Server. Any client application can share that particular bean to perform a add / subtract task without creating the business logic all over again.
Programmers can to use any class in their client applications which are exposed as a EJB on the Application Server. This is really very powerful. The re-usability of code makes a lot of sense in case large applications with huge business logic.
The below diagram is from Wikipedia and is quite simple & understandable.

Now when we have some idea on EJB, we can move forward with a sample application. Lets create the above mentioned Mathematical Operation Bean.
STEPS TO CREATE EJB SAMPLE APPLICATION
We will be using Eclipse IDE and JBOSS application server for this application. Below are the steps to develop the application.
1. Download JBOSS application server.
Download jboss-5.0.0.GA.zip from http://sourceforge.net/projects/jboss/files/JBoss/JBoss-5.0.0.GA/ and extract the compressed file.
2. Setup JBoss AS with Eclipse.
In Eclipse, open Server view (Window –> Show View –> Servers). Right click on Servers view and choose
New –> Server.
Select JBoss v5.0 and browse the extracted JBoss folder as the Application Server Directory.
3. If everything goes well, JBoss should run successfully.
Right click on JBoss v5.0 at localhost over server view window and select Start.
4. In Eclipse IDE, go to New –> Enterprise Application Project. Choose a project name, eg MatheModule and click Next.

5. In the next screen, Click on New Module… Uncheck Application Client Module & Connector Module and keep WEB Module & EJB Module checked. Click Finish.
Make sure check the “Generate application.xml deployement descriptor” chekcbox. Click Finish.
6. Now the structure is almost ready to start coding. Right click on MatheModuleEJB and choose New –> Interface.
Choose a package name eg. com.mf.stateless and interface name eg. MathRemote.

Add the below code in MathRemote interface.
package com.mf.stateless;

public interface MathRemote {
public float add(float x, float y);
public float substract(float x, float y);
}
7. Now create the bean class. Right click on MatheModuleEJB and choose New –> Class.
Choose a package name eg. com.mf.stateless and interface name eg. MathRemoteBean.

Add the below code in MathRemoteBean class.
package com.mf.stateless;

import javax.ejb.Stateless;
import javax.ejb.Remote;

@Stateless
@Remote(MathRemote.class)
public class MathRemoteBean implements MathRemote{
@Override
public float add(float x, float y) {
return x + y;
}

@Override
public float substract(float x, float y) {
return x - y;
}
}
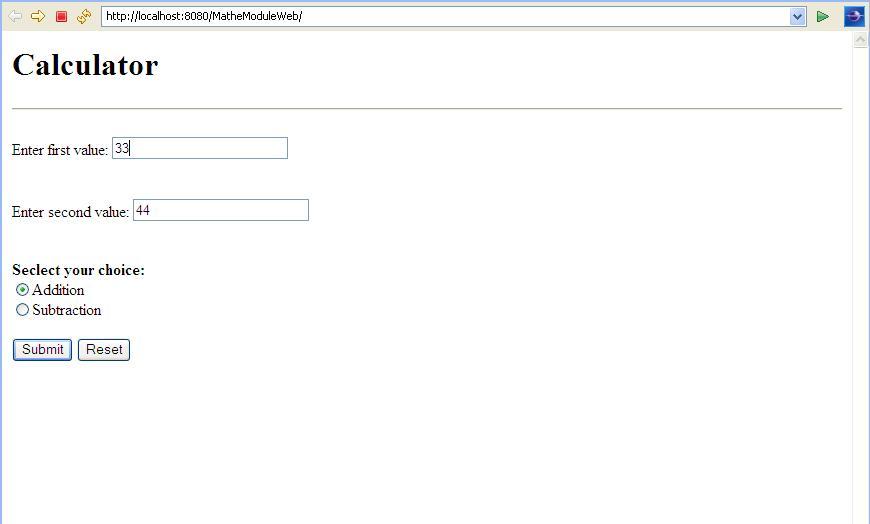
8. EJB setup is done. We will use the Web Module ie MatheModuleWeb as the EJB client. First create a JSP file and name it as index.jsp. Go to WebContent –> New –> JSP.

Click Finish. A new file ie index.jsp will be created under WebContent.
Add the below code in index.jsp file.
<html>
<head>
<meta http-equiv="Content-Type" content="text/html; charset=ISO-8859-1">
<title>Insert title here</title>
</head>
<body>
<h1>Calculator</h1>
<hr>
<form action="MathClient" method="POST">
<p>Enter first value:
<input type="text" name="number_1" size="25"></p>
<br>
<p>Enter second value:
<input type="text" name="number_2" size="25"></p>
<br>
<b>Select your choice:</b><br>
<input type="radio" name="group_1" value ="add">Addition<br>
<input type="radio" name="group_1" value ="sub">Subtraction<br>
<p>
<input type="submit" value="Submit">
<input type="reset" value="Reset"></p>
</form>
</body>
</html>
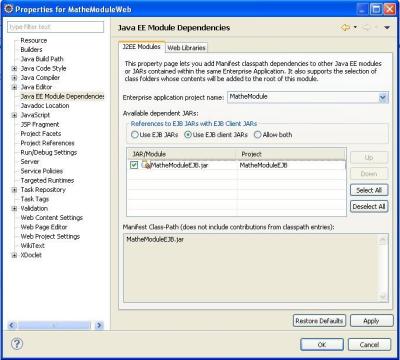
9. Before implement this method, we need to create a binding between the Web Module and the EJB Module. To do that right mouse click on MatheModuleWeb –> Properties.
Go to J2EE Module Dependencies and mark the option MatheModuleEJB.jar. Thus your Web module will see the EJB interfaces, but remember, you cannot call it directly.
10. Now create a servlet. Right click on MatheModuleWeb –> New –> Servlet.
Choose a package name eg. com.mf.servlet and servlet name eg. MathClient.

Click Finish.
11. Add the below code in doPost() method of MathClient servlet.
PrintWriter out = response.getWriter();
float result = 0;
try {
String value_1 = request.getParameter("number_1");
String value_2 = request.getParameter("number_2");
String value_3 = request.getParameter("group_1");
if (value_1 != null && value_2 != null && value_3 != null) {
Float num1 = new Float(value_1);
Float num2 = new Float(value_2);
InitialContext ctx = new InitialContext();
MathRemote mathOperations = (MathRemote) ctx.lookup("MatheModule/MathRemoteBean/remote");
if (value_3.equals("add"))
result = mathOperations.add(num1.floatValue(),num2.floatValue());
else if (value_3.equals("sub"))
result = mathOperations.substract(num1.floatValue(),num2.floatValue());
}
} catch (Exception e) {
out.println(e.toString());
}
out.println("The result is: "+result);
12. MatheModule application is ready to Run now. Right click on MatheModuleWeb –> Run As –> Run On Server.

Thanks for your time. Hope this helps.
Happy Coding… 🙂
Rupal Chatterjee
Software Engineer, Mindfire Solutions
http://www.mindfiresolutions.com

Connect me on Google, Facebook